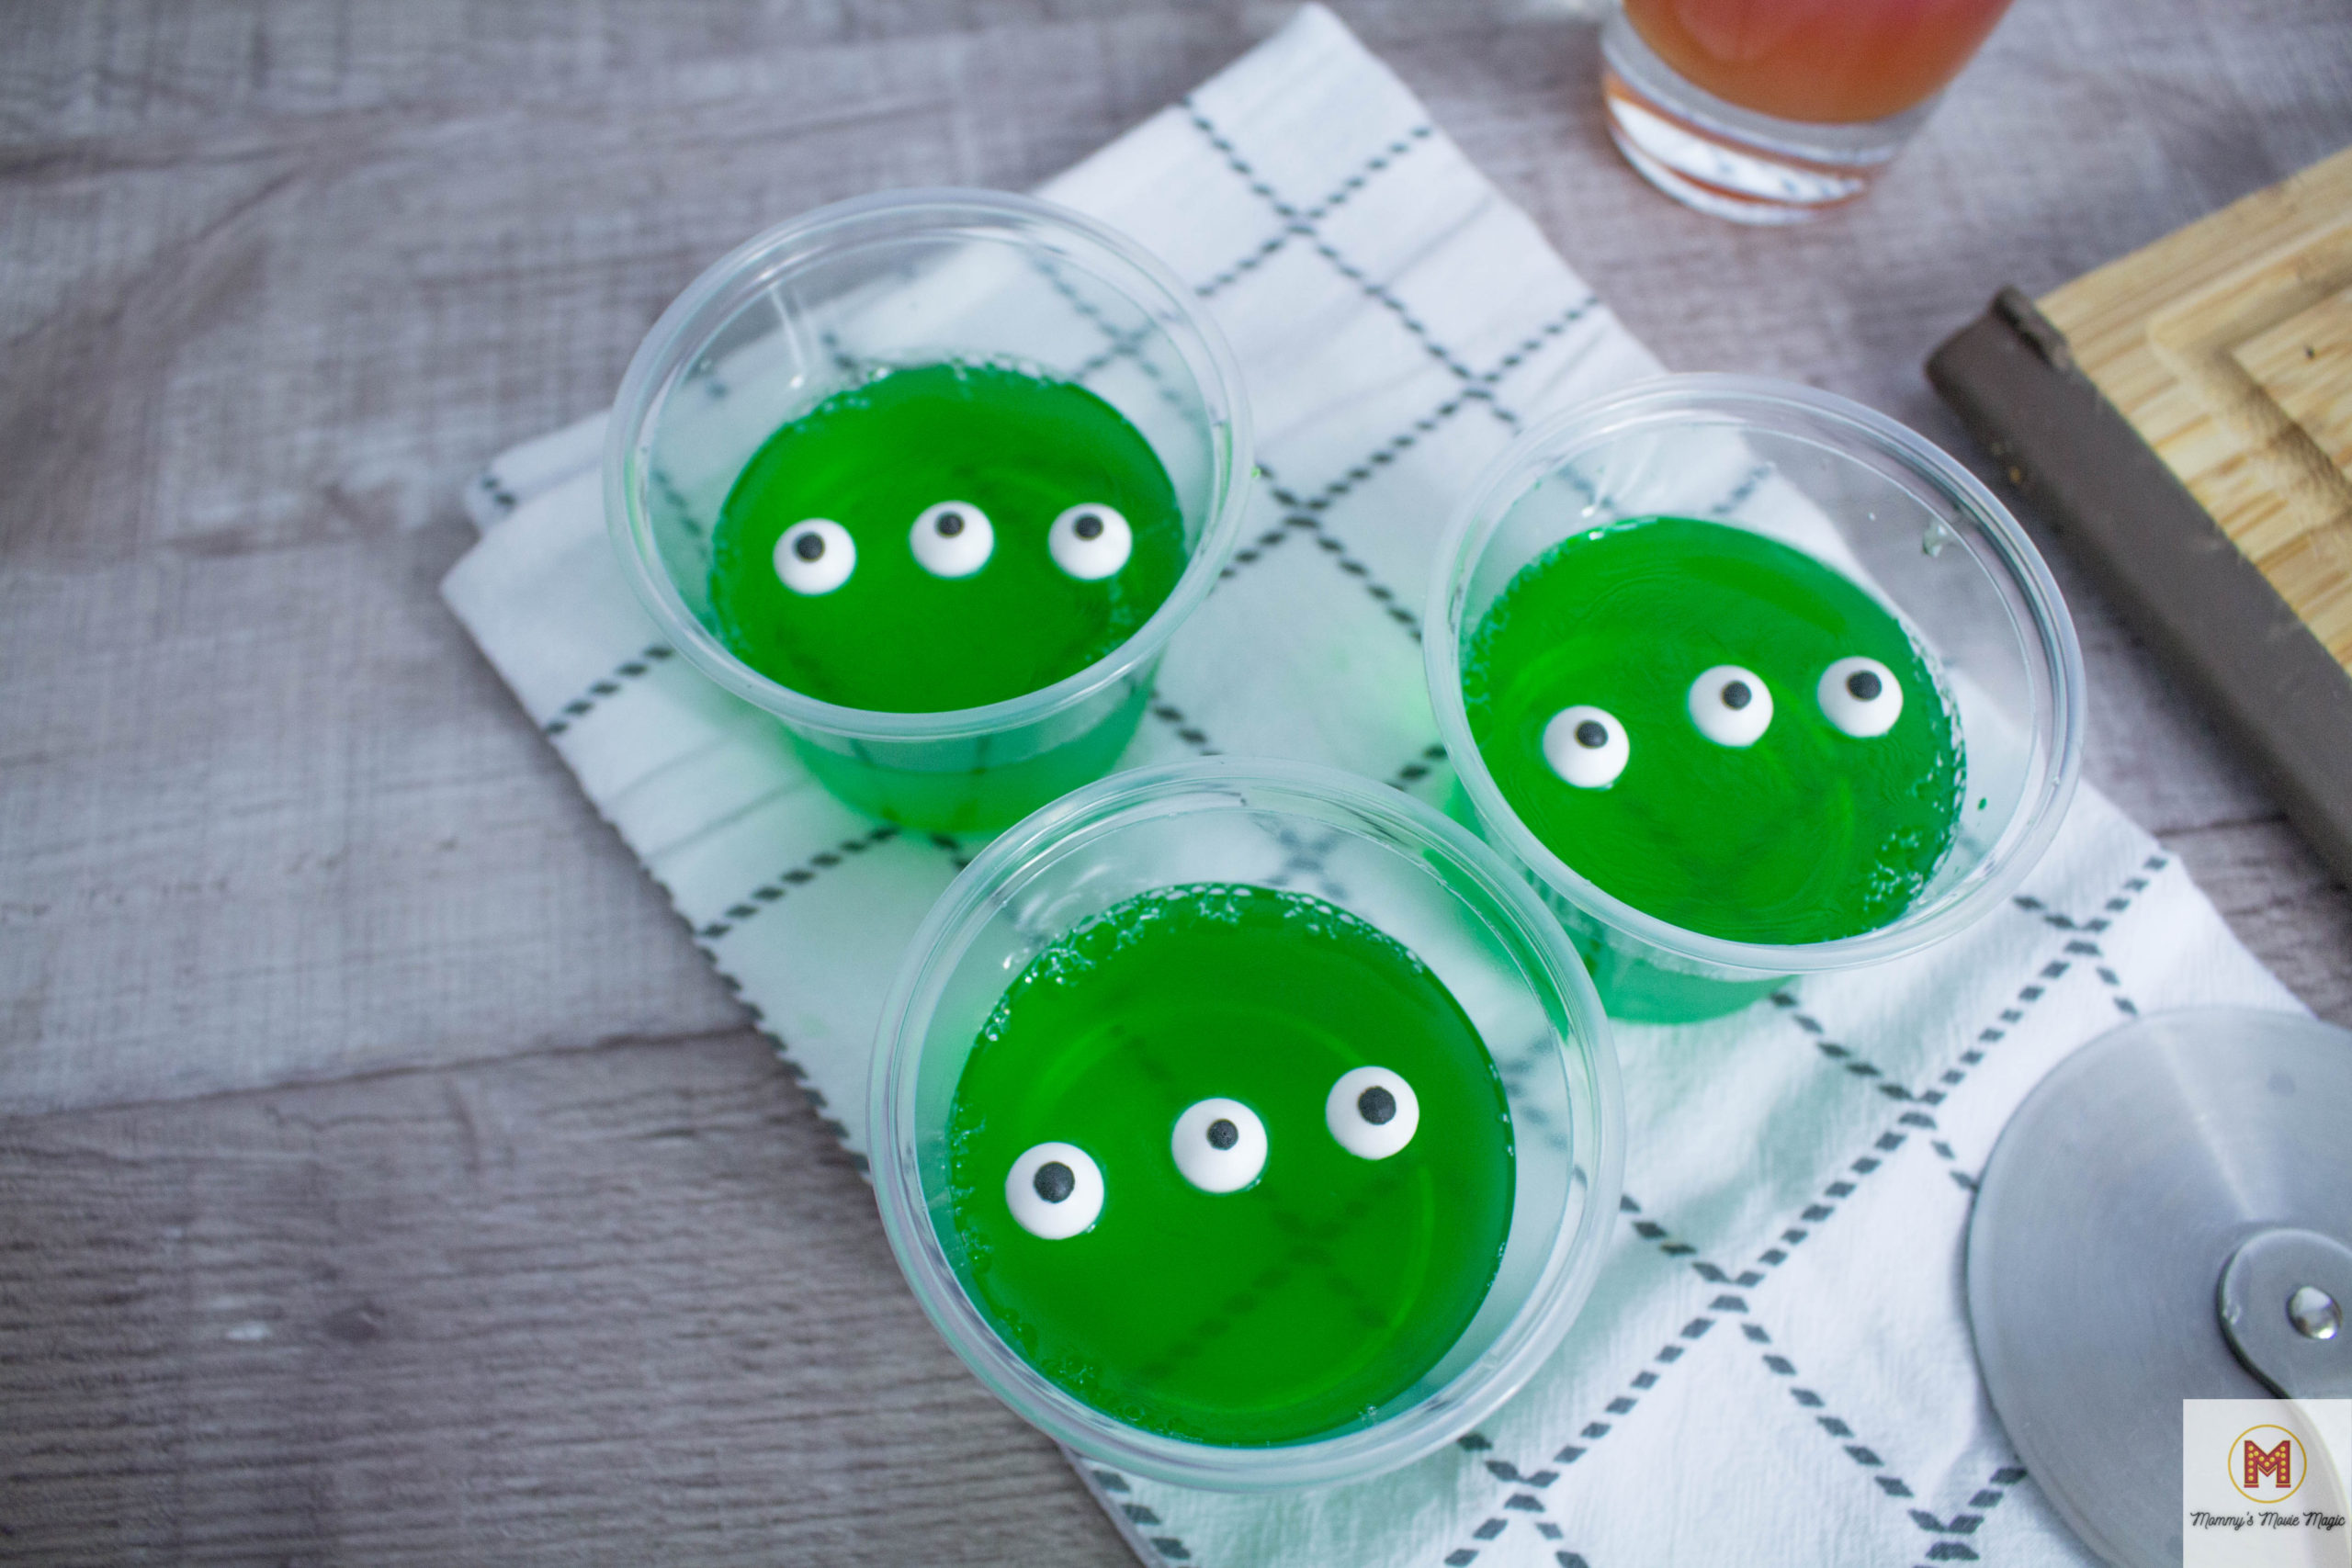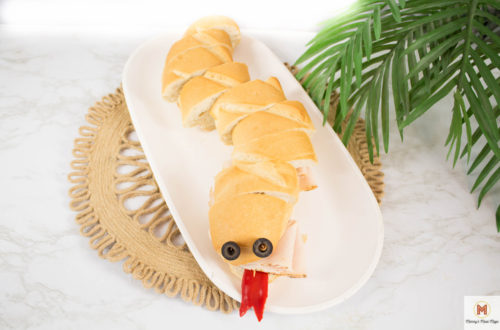

Disney Cars Movie Night Party
This movie-night has been a little while coming. I know quite a few friends with little ones who are in love with Lightning McQueen and his friends. Mater is hilarious and Radiator Springs is the cutest little town ever. It provided a lot of inspiration for our fun tonight.
Cars Movie Night Menu
Our menu really had some fun foods this week. The main inspiration came straight from Radiator Springs. With such fun ideas like the Cozy Cone Motel, Flo’s Cafe, Luigi’s Tires, and much more of those fun places in town, we were filled with so many choices for our movie night dinner. So here were our choices:

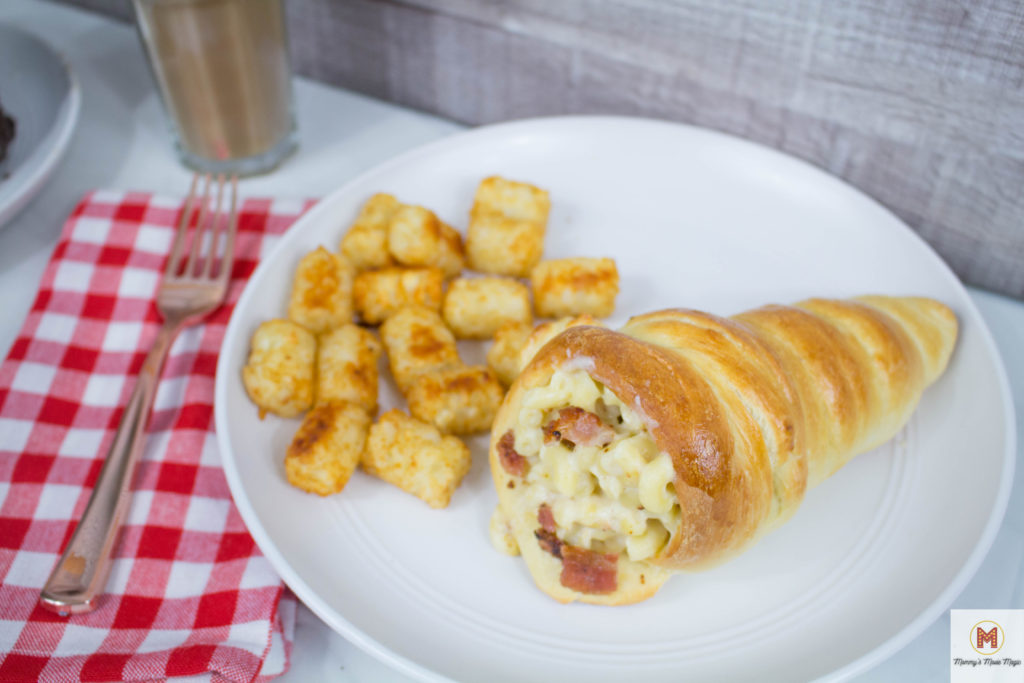
We took some great inspiration from the Cozy Cone Cafe in Disneyland. They serve these bread cones filled with bacon mac and cheese. Why try to invent the wheel when an amazing food choice was presented to me already?
I just had to figure out how to make my own bread cones. This was going to be a fun challenge.
The mac and cheese part was easy. And I had an exciting time making my own donuts. I also opted for a simpler drink this time around, but it all pulled together nicely. I can’t wait to show you! Let’s get into it!
Cozy Cone Bread Cones – Cars Movie Night
At first, I started following a recipe I found, but it completely flopped the first time around.
Luckily, I know enough about bread making to kind of create my own rendition of the recipe. So I will take you step by step here on what I did to make these bread bowl recipes because it was quite different than the one I tried to follow originally.
To make these bread cones, I combined all the dry ingredients in a bowl together.
Then I mixed together with the active yeast with 1/4 cup warm water until totally dissolved.
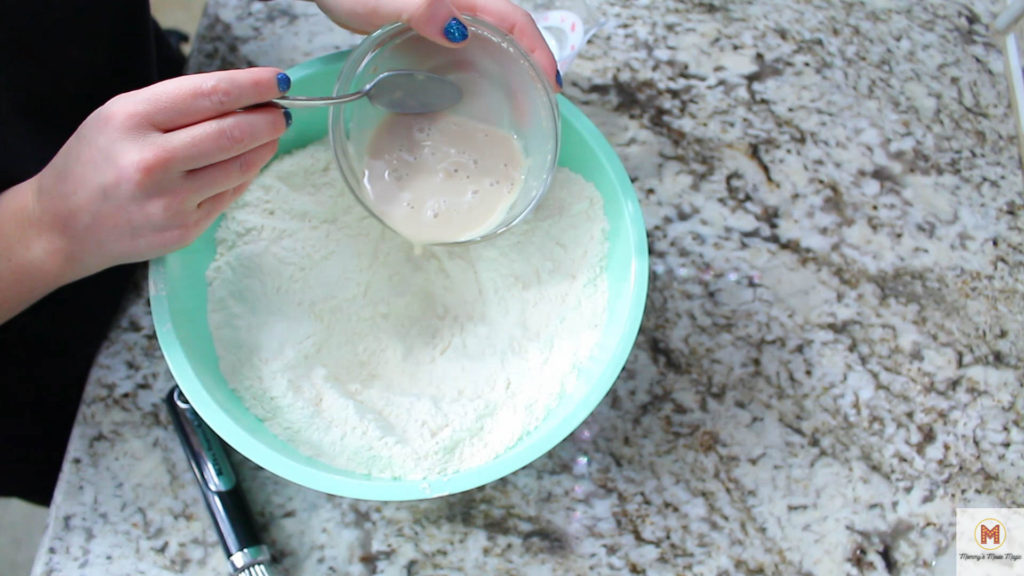
Next, I created a well in the middle of my dry ingredients, where I then poured in all of my wet ingredients and mixed it all together.
*Note* In my video, I added in the melted butter, 1/2 cup of extra flour, and extra water towards the end because this is how I truly saved and created my bread dough. But I want you to add that all in at the beginning because my learning is your gain! So the adjustments are in my recipe.
Once the dough is mixed, pour the dough out onto a lightly floured surface and kneed until the dough is smooth, which is another 5-10 minutes.
Then you want to place the dough into a lightly oiled bowl, and let it rise for an hour.
While the dough is rising, we’re going to make our cones. Now I was skeptical at first but this really was a great way to make these cones!
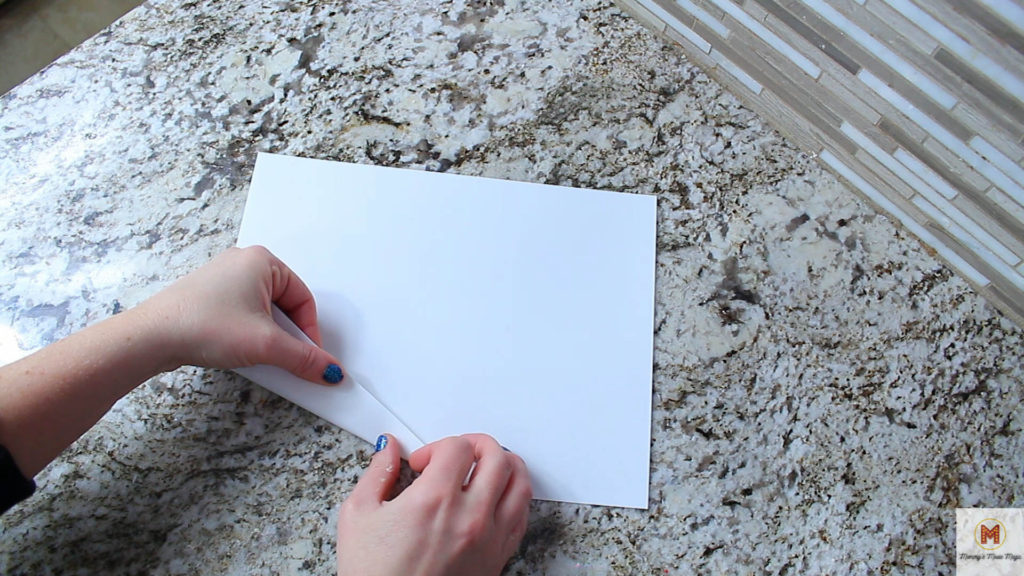
Take your piece of card stock paper and turn it sideways. Cut your piece of aluminum foil to be longer than your piece of paper.
Start rolling your card stock at almost the halfway mark of the paper, and keep rolling until you get a cone shape. No need to tape it, as it will keep its shape when rolled in the tin foil.

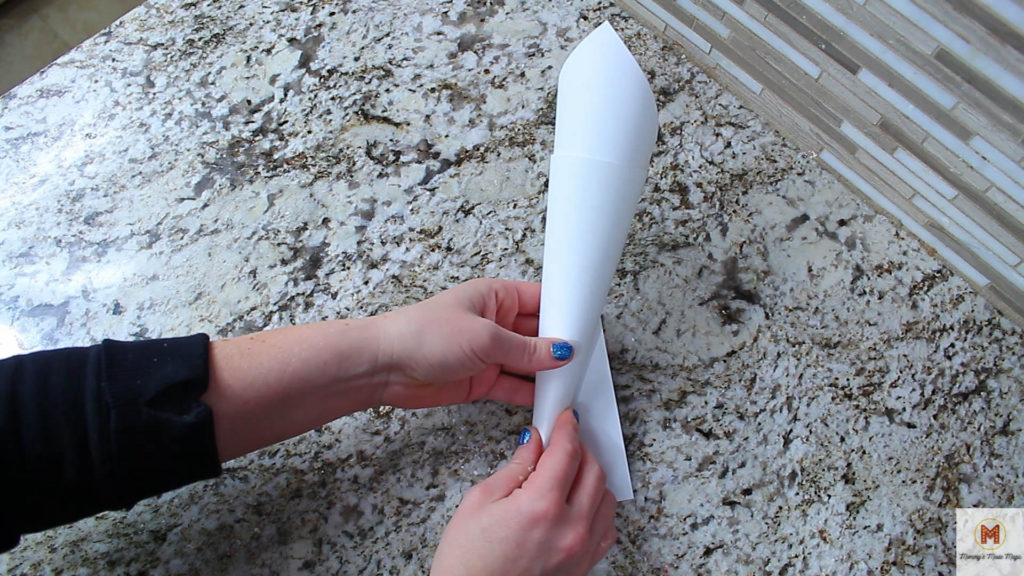
Next, you want to roll your card cone up in your tin foil, until it is fully covered. Fold any extra foil you have over the card cone. Ta-da! You have a great cone shape ready to go!
Now once the dough has risen, cut the dough into 8 pieces and let it rest for 5 minutes.
Roll out one piece of dough until it is 30 inches in length
Spray one of your cones with non-stick spray, and place the bottom of the cone at one piece of your rolled-out dough.
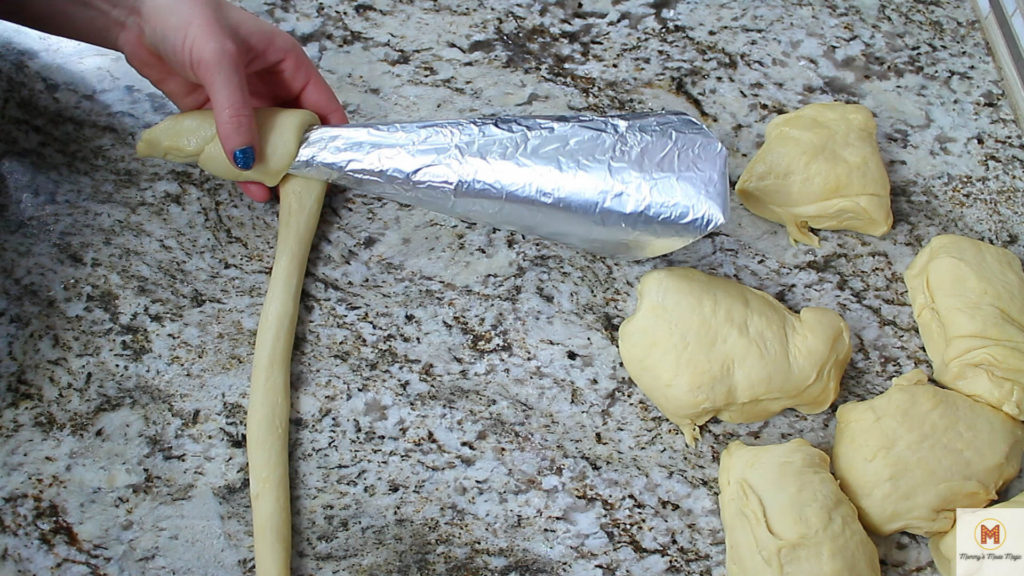
Start rolling your cone over the dough until all the dough is wrapped around the cone. Repeat with all 8 pieces of dough.
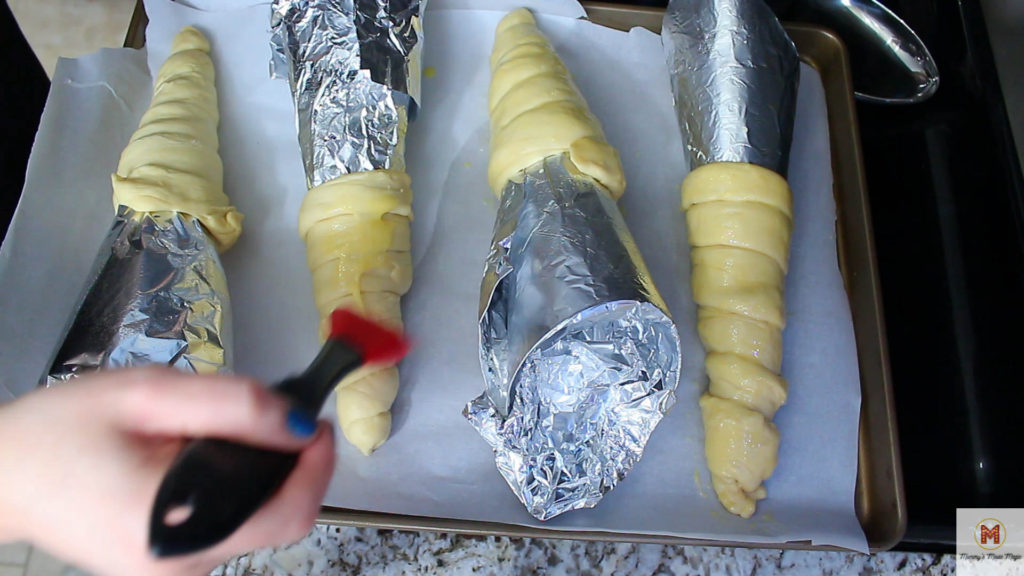
Place all the cones onto a parchment-covered sheet and cover them in an eggwash.
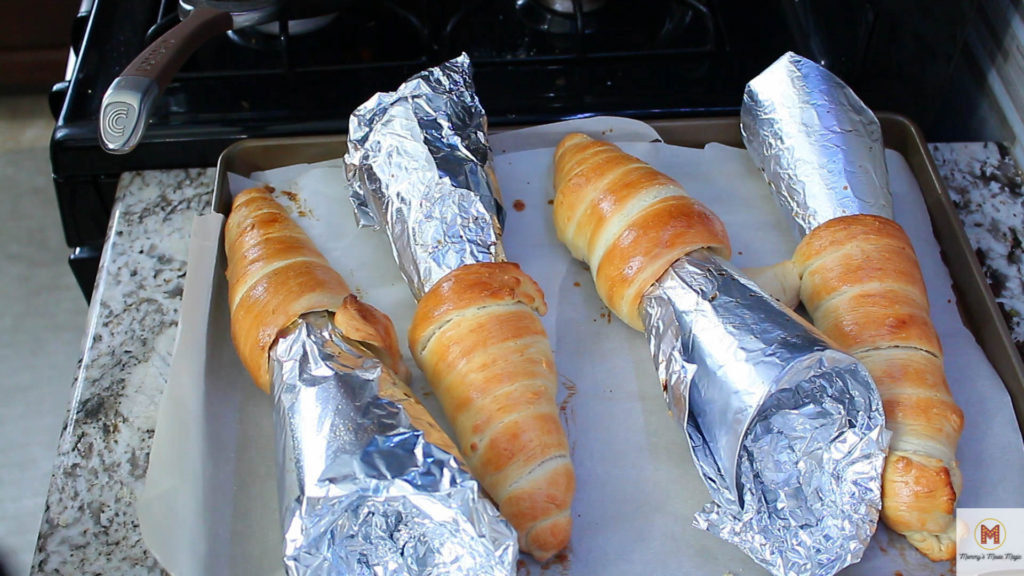
Finally, bake in the oven at 400 for 16-18 minutes until golden brown.
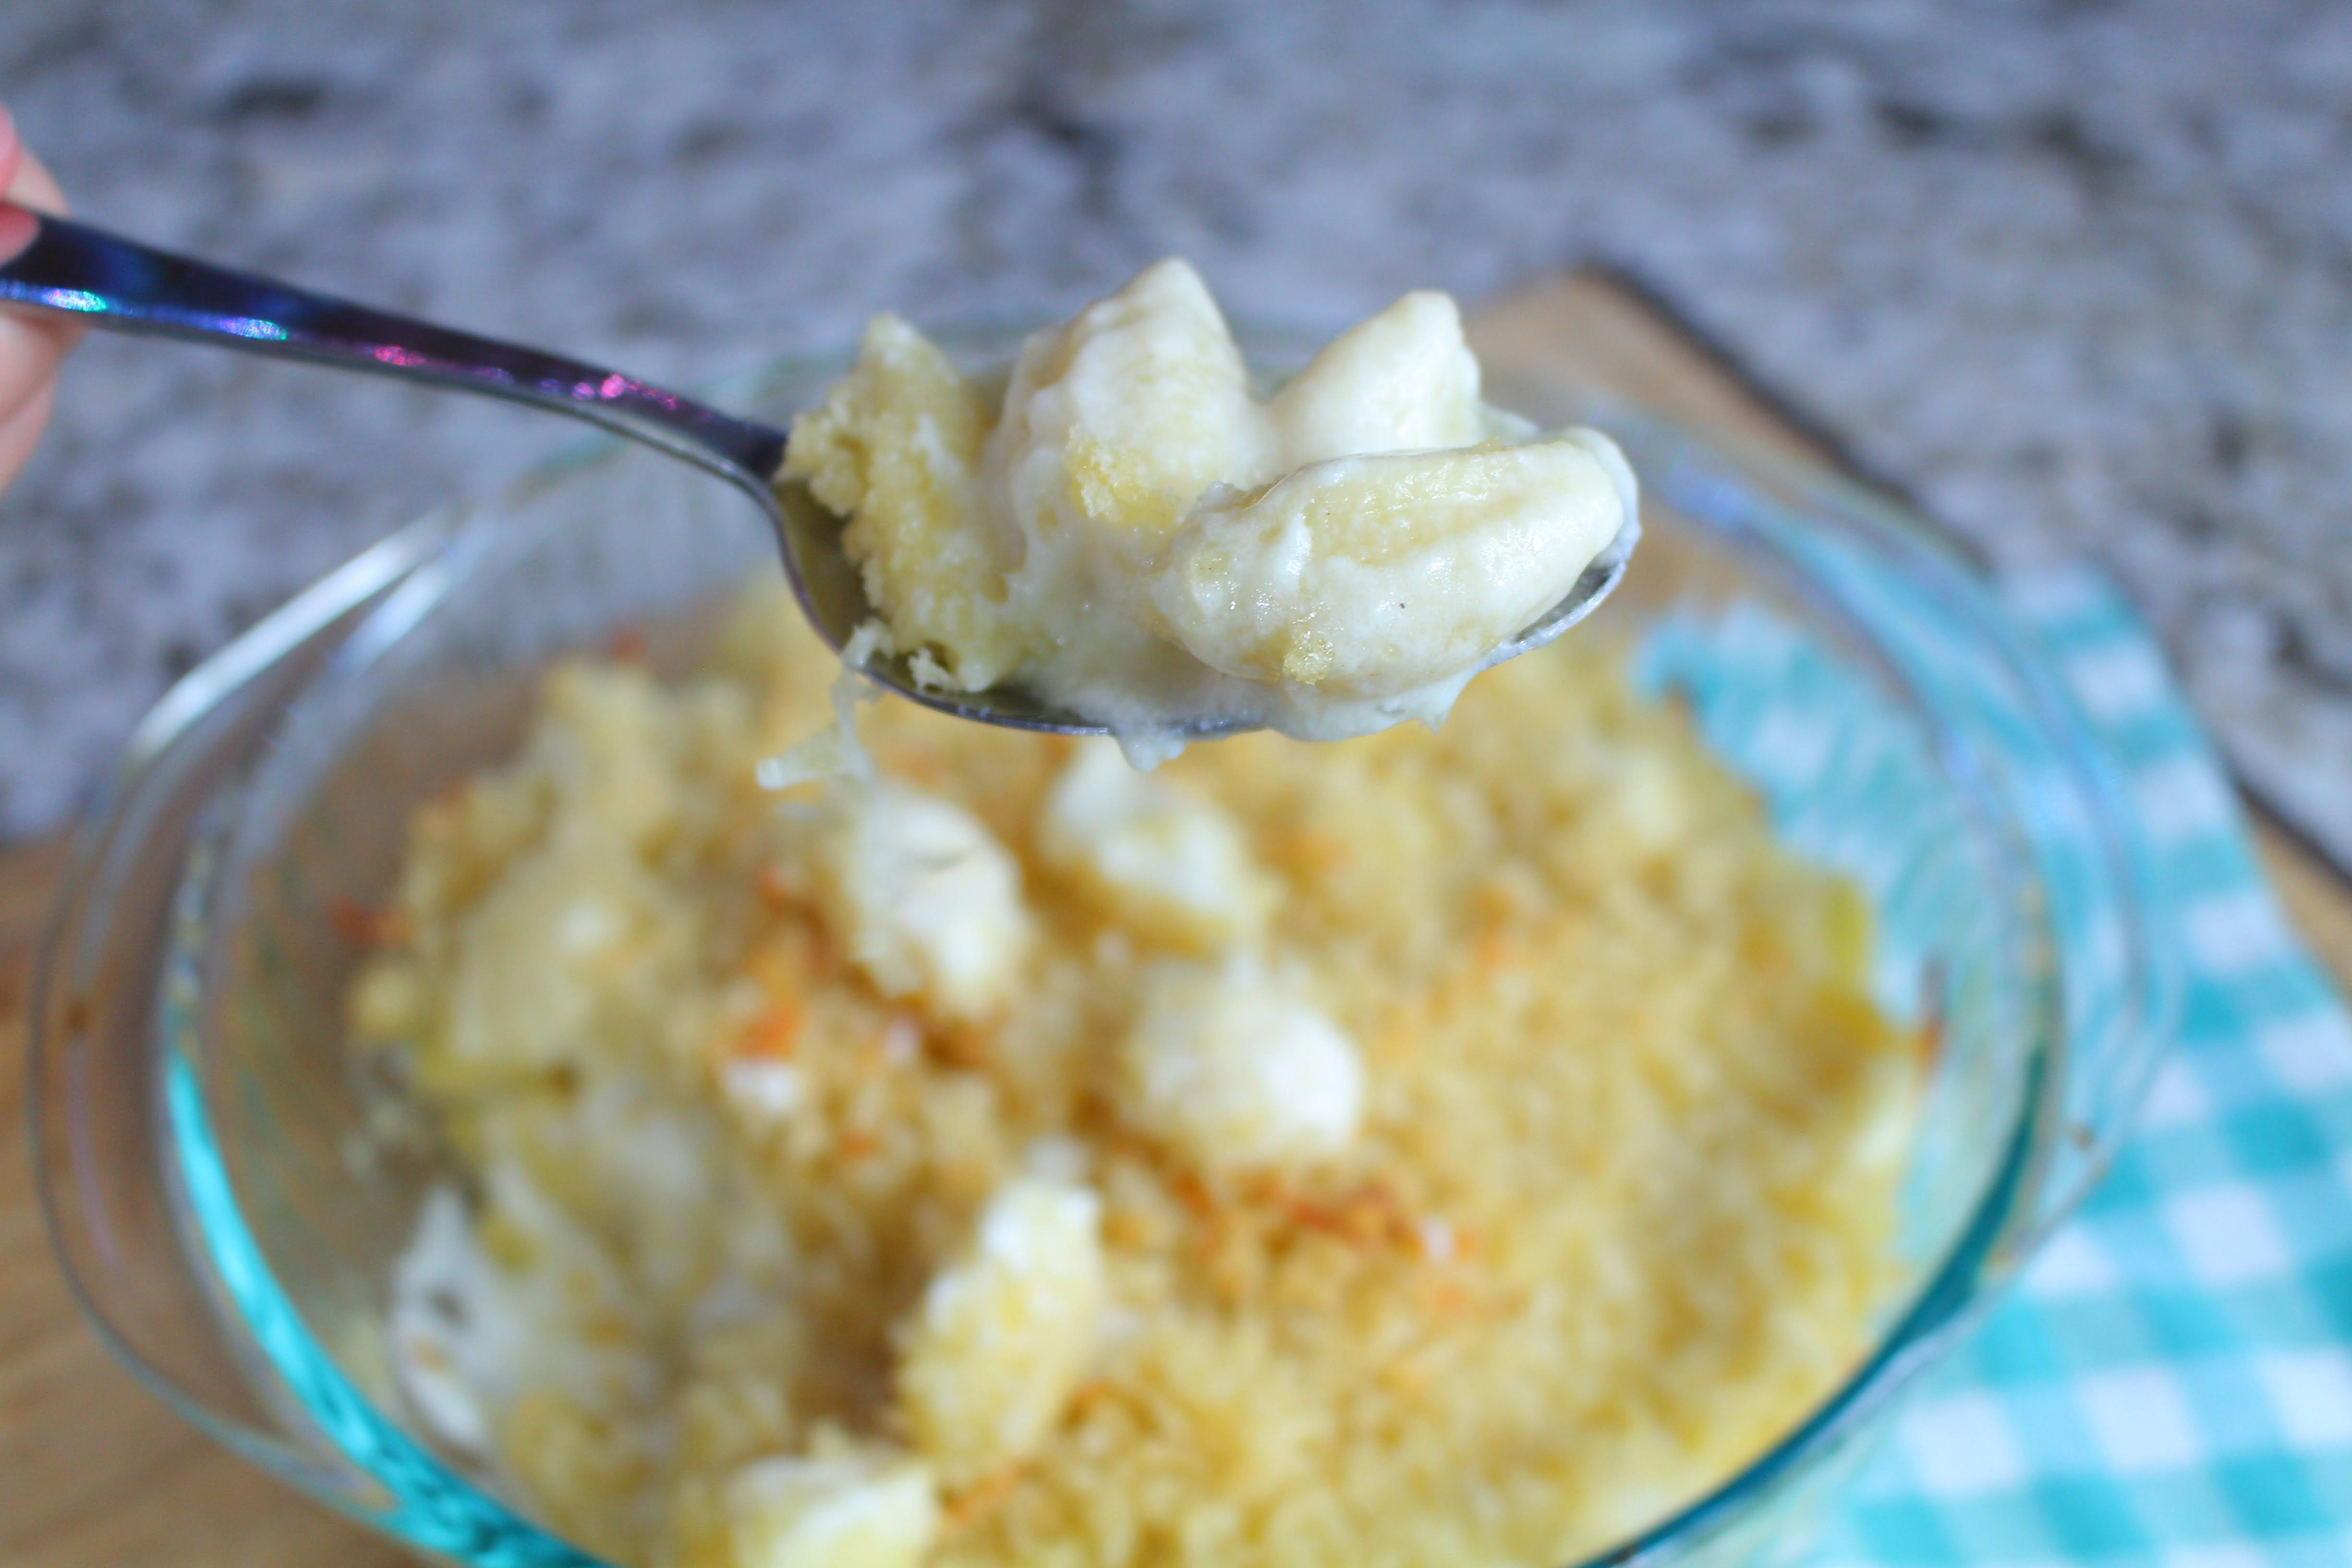
Mack’s Bacon Mac and Cheese
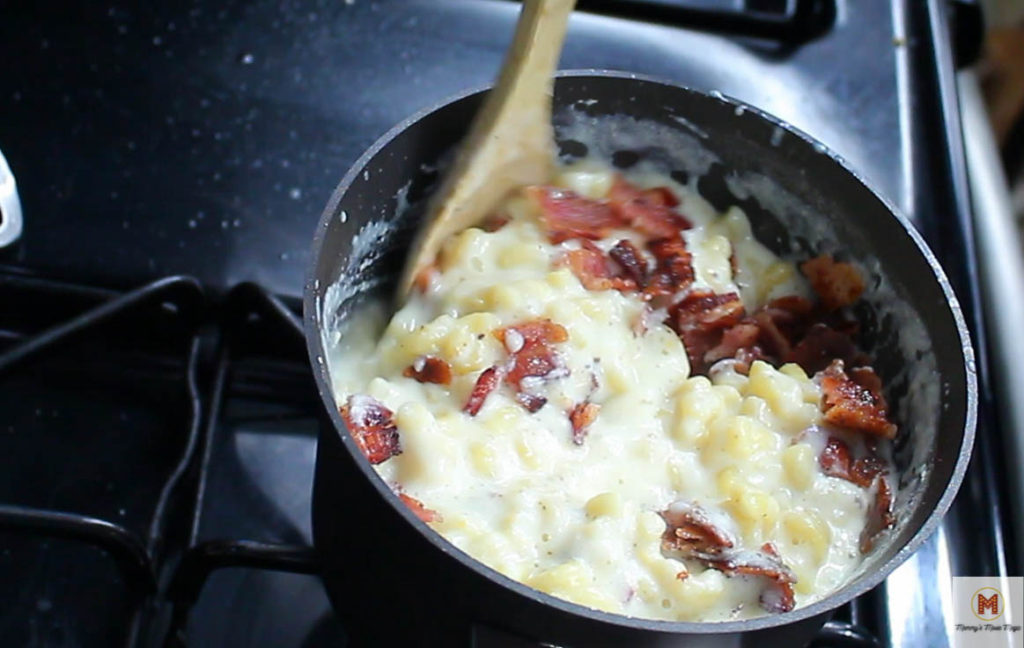
I decided to fill up my cones with bacon mac and cheese. Mack’s mac and cheese. It just seemed like a great option that everyone would love to fill up their cones! And it was delicious!
My mac and cheese recipe is the same one I used for my Little Mermaid Movie Night. You can check it out here: Little Mermaid Movie Night
Boil up your macaroni on the stove and set aside the pasta.
Create a roux with your butter, flour, and mustard. Then add in your milk and let it boil up.
Stop boiling your milk then add in your cheese, sugar, salt, and pepper. Add in your pasta back to the mid and you are good to go!
If you want to make it bacon mac and cheese, add in the bacon here as well and more on top if you want.
Stuff it inside your cone, and you are good to go!
Mater’s Taters – Cars Movie Night
{Taters photo}
I needed an extra side, so I just popped in some tater tots in the oven and we had Mater’s Taters. (See, sometimes I don’t always make things homemade!)
Luigi’s Leaning Tower of Donut Tires
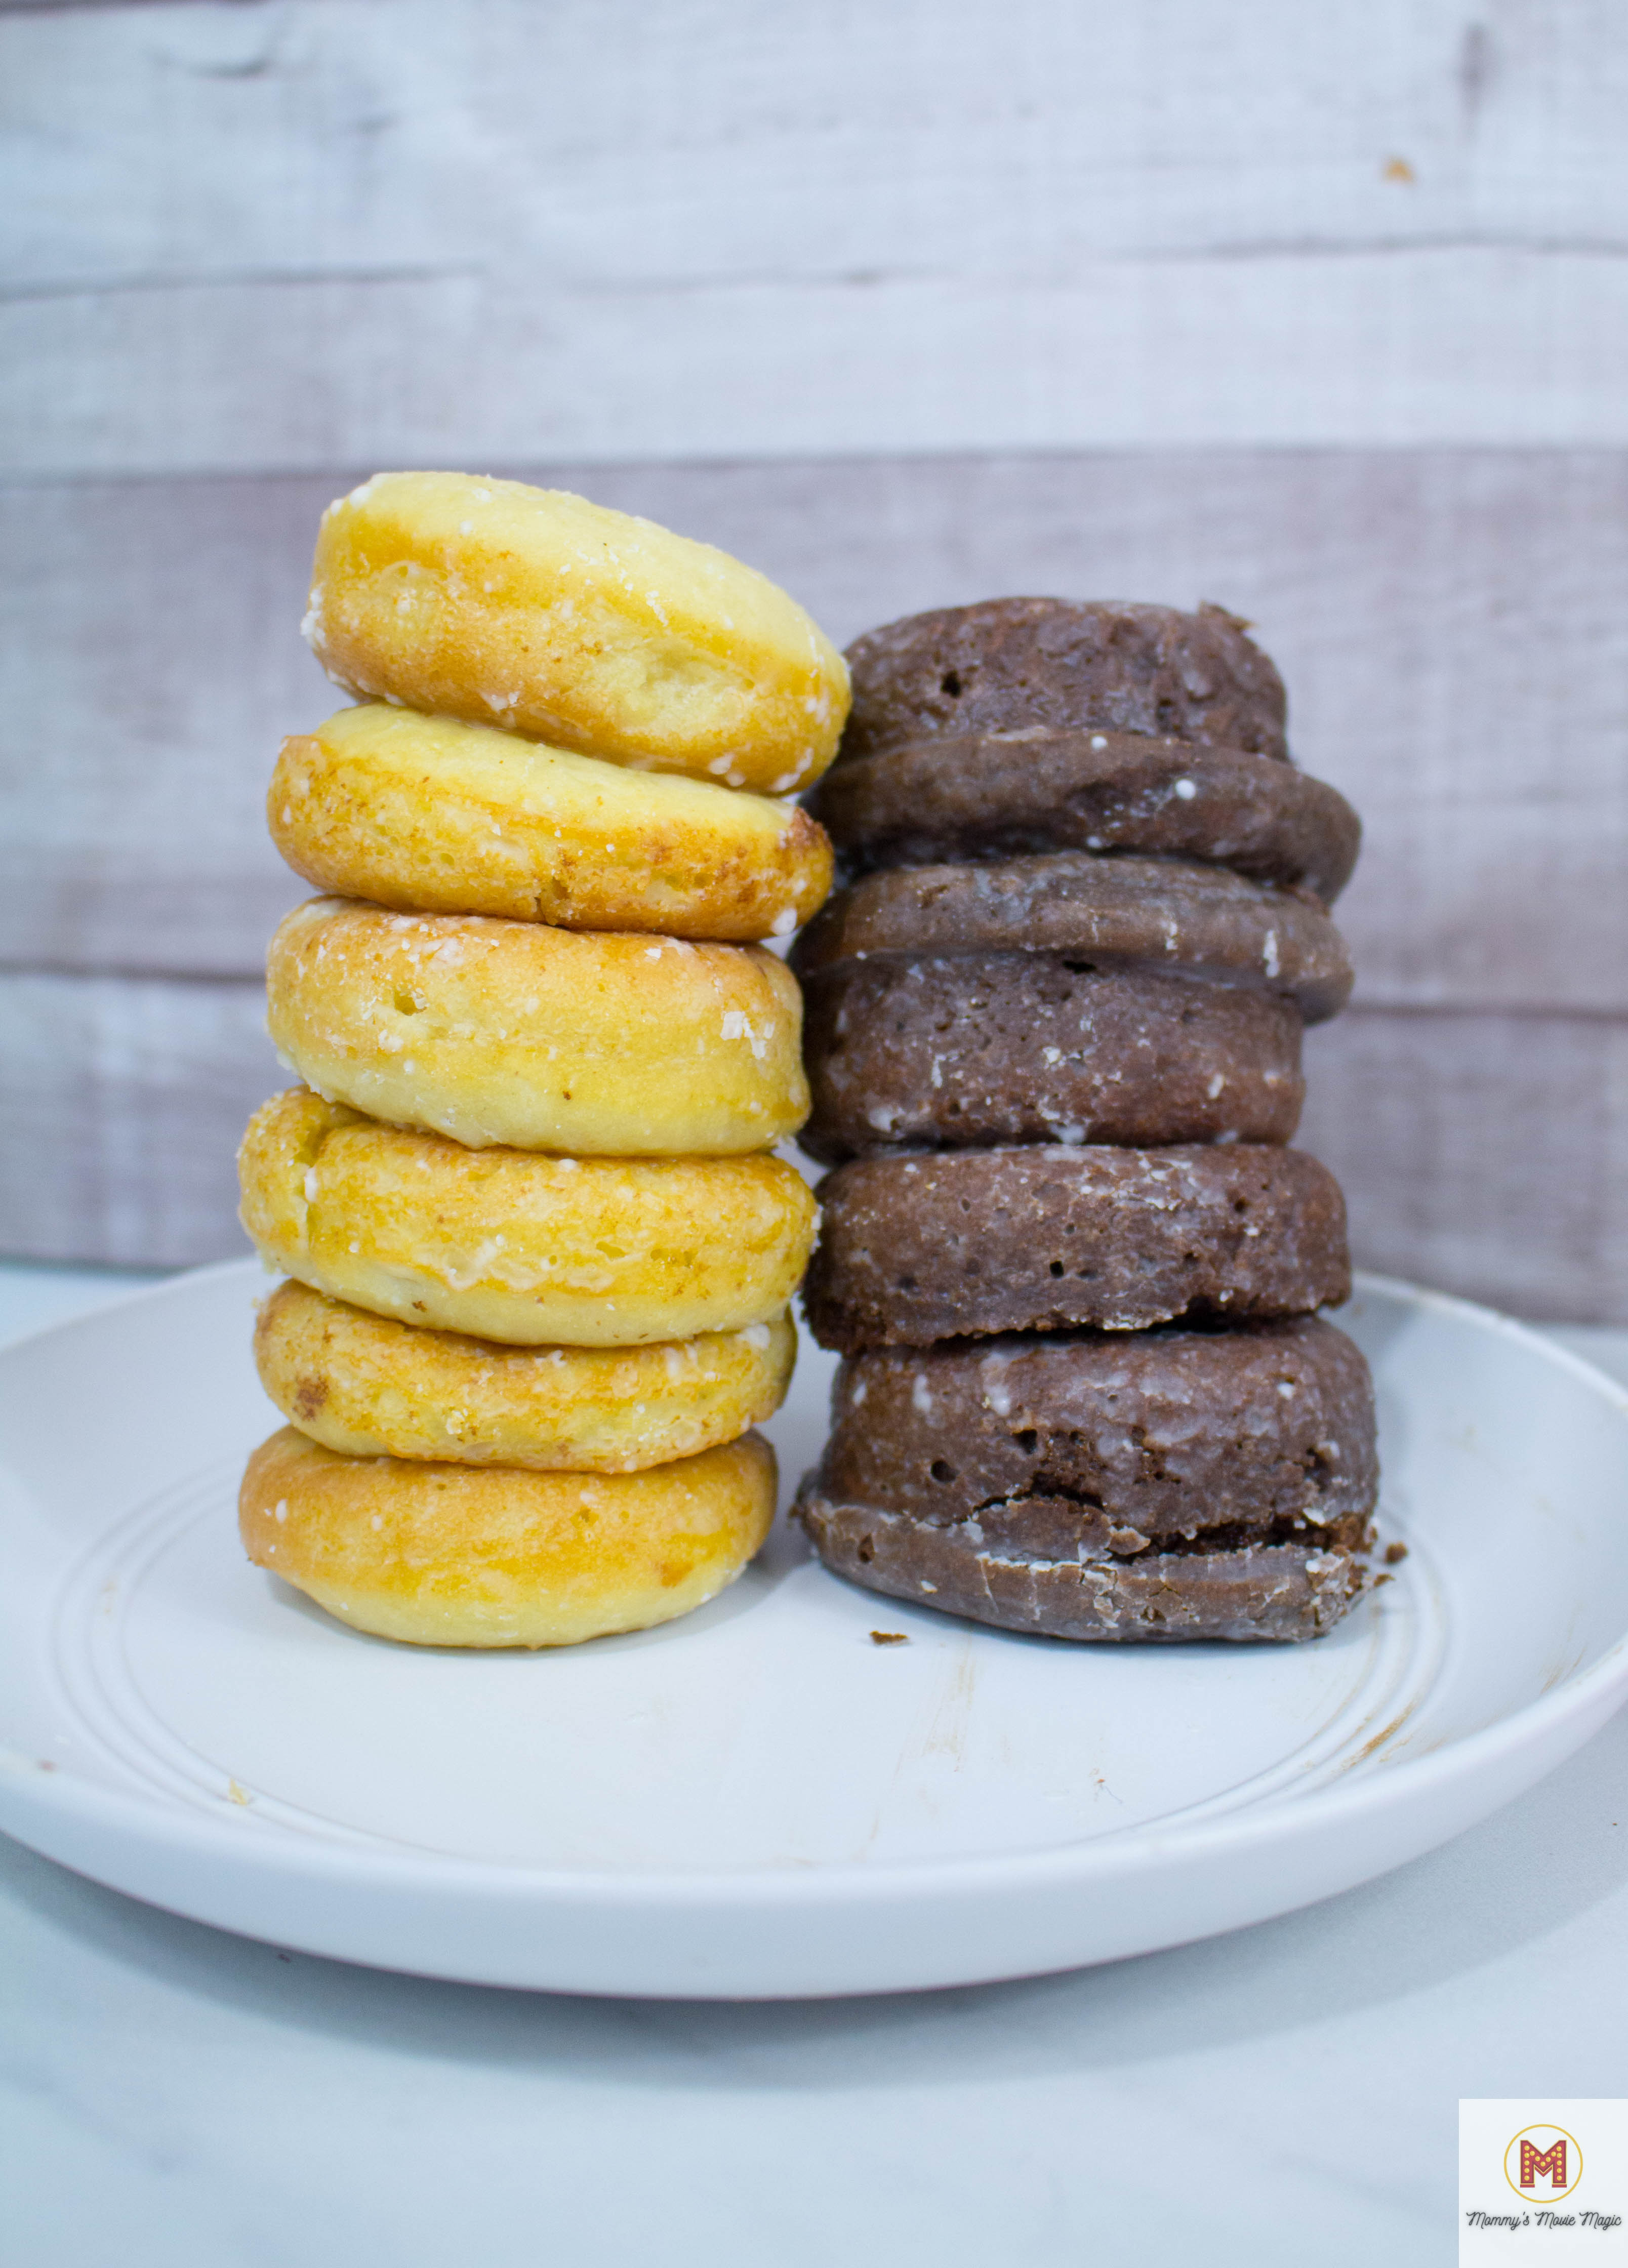
Luigi’s leaning tower tires were a great addition to this movie night. I thought mini donuts would be better than regular donuts, and I thought I’d try my hand at making them myself. So here we go!
I found an easy recipe that I converted into mini donuts from Buns in my Oven. I knew I wanted to make chocolate donuts because tires are black. My family is not a huge fan of chocolate-flavored anything, we just prefer vanilla. So we made vanilla donuts also. I used the same recipe, just omitted the cocoa powder.
Check out the original recipe here: Chocolate Glazed Donuts
I found this mini donut tin at Target and it was the perfect silicone pan for our tires. The best part was that it was silicone and I could pop out the donuts a little easier when they were done.
I also made this recipe twice so I could make one chocolate recipe and one vanilla.
The girls also had fun seeing who could build a taller tower of tires before devouring them.
Root “66” Beer Float- Cars Movie Night Drink
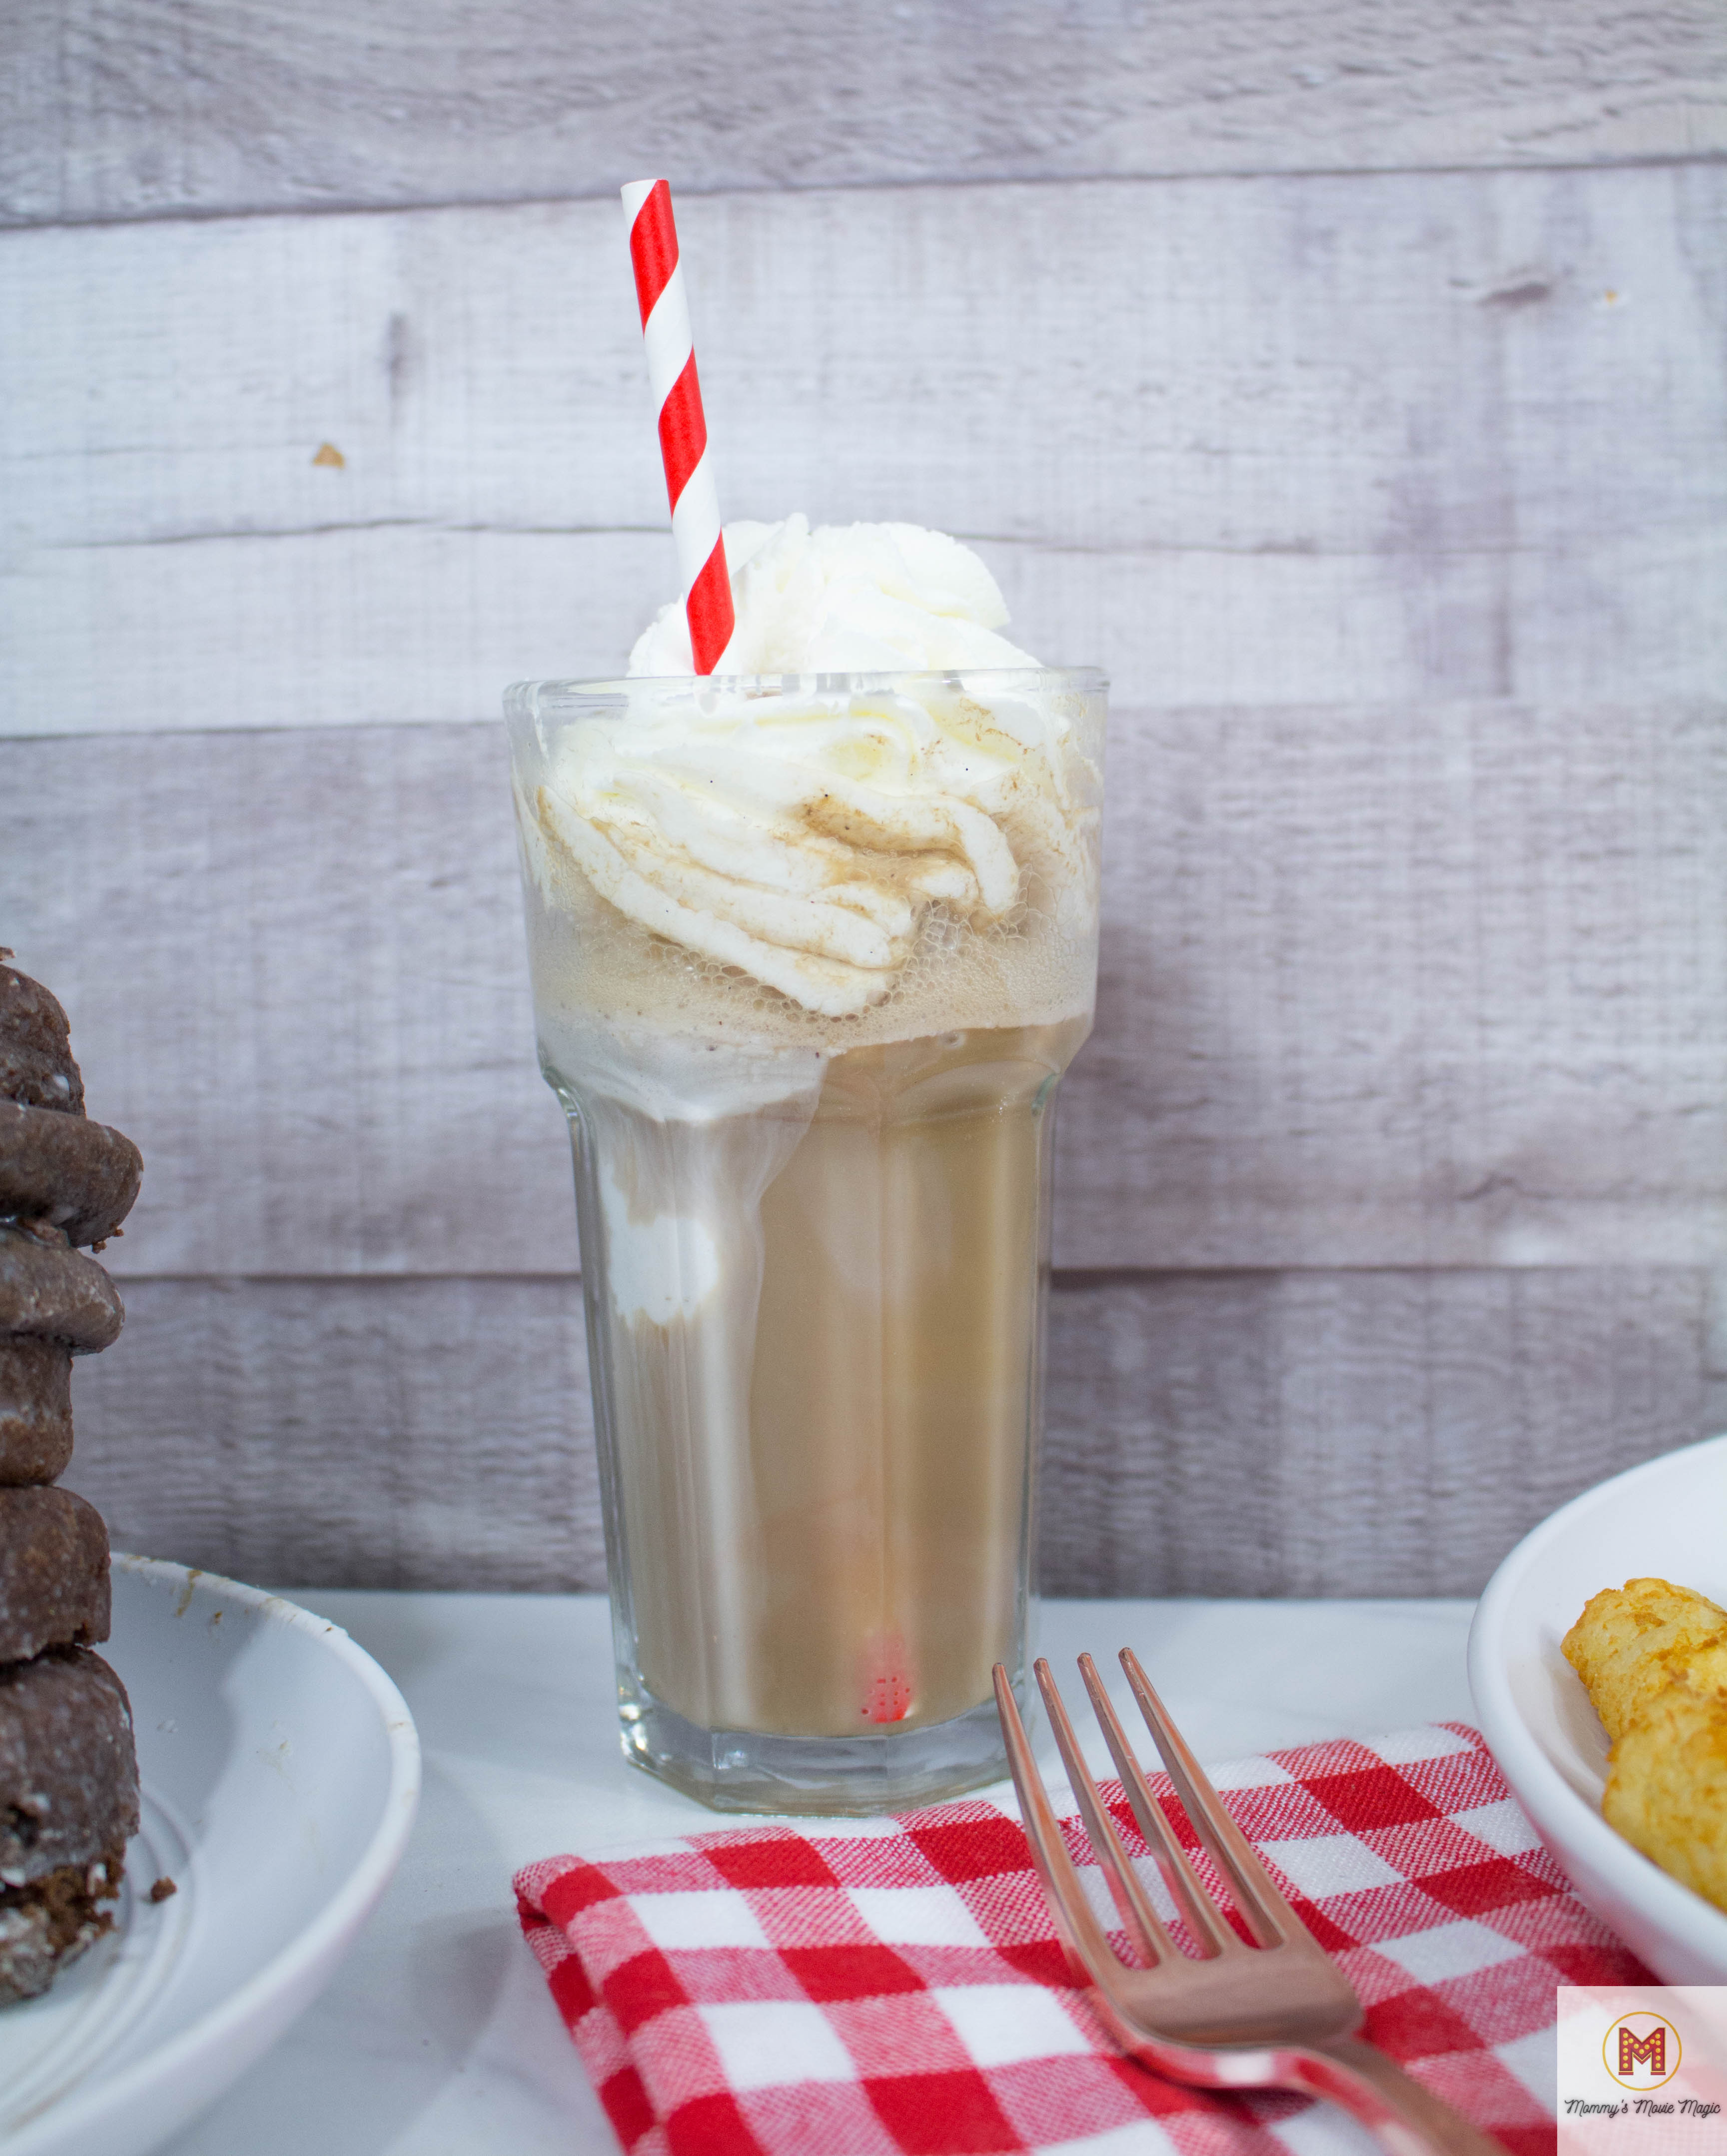
I opted for a simpler movie night drink tonight. Simpler does not mean less fun! Oh no! Only in want of something because lately, I’ve been making some pretty intense fun drinks. Check out my Trolls World Tour Movie Night for a fun Rainbow drink!
We made root beer floats tonight, which we called Root “66” Beer Floats.
If you haven’t made a root beer float, it’s really easy. We put our ice cream in the glass, poured in our root beer, and topped it off with fresh whipped cream. Easy enough!
Simple, yet delicious option from Flo’s diner!
Cars Movie Night Crafts
Cars Popsicle Stick Craft
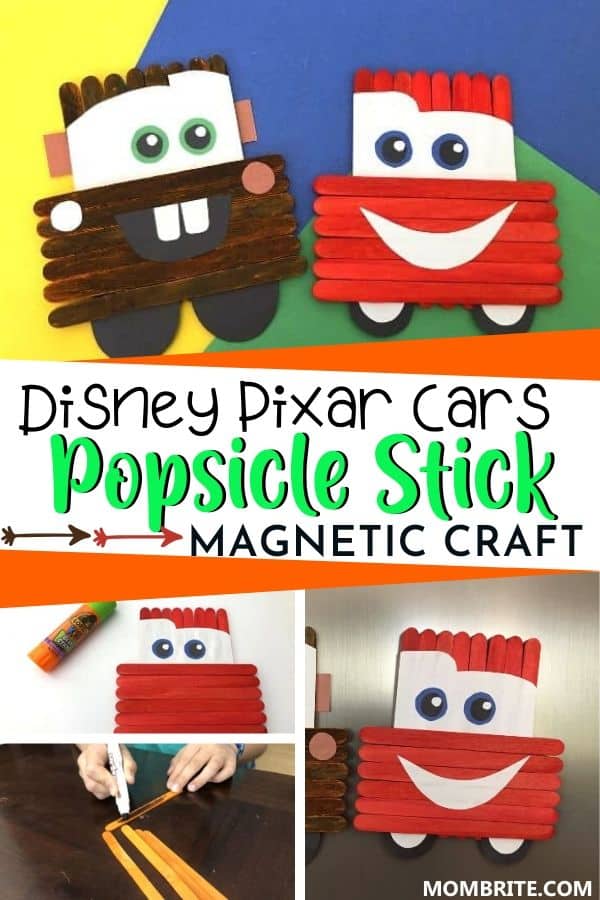
This craft from Mater is a great option for your little ones. I love an easy craft and it doesn’t get any better than this! Check out the original directions here: Mom Brite – Cars Popsicle Stick Craft
Cardboard Cars Craft
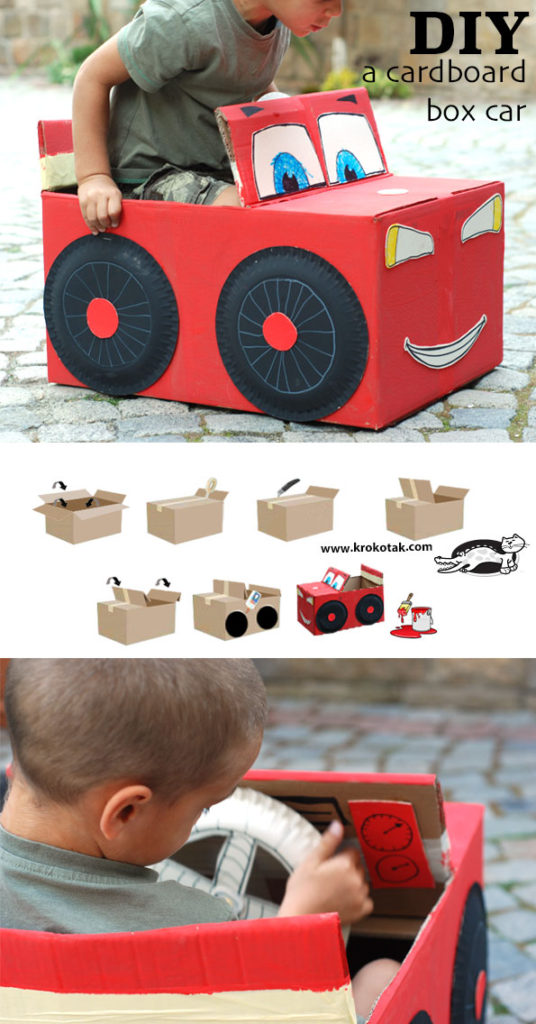
Have some more time on your hands? Try out these even bigger cardboard Cars that your kids can even sit in for the movie! Check out the original directions here: Krokotak – DIY Cardboard Box Cars
Toilet Paper Roll Cars

Want something a little smaller than a big cardboard box craft? These toilet paper roll crafts are a perfect smaller version for you. Check out this smaller craft for your Cars Movie night here: Disney Family Cars Craft
3…2…1…GO!
You are ready to go for your very own Cars Movie night! Please feel free to reach out if you need any more guidance for your movie night.
Leave a comment below on how your Cars movie night turned out! I love hearing from you! Let me know how it turned out and what your favorite part was.
Don’t forget to save your favorite recipes from my Pinterest Page.
Also, the behind-the-scenes stuff on my Instagram page.
Bread Cones
Ingredients
- 4.5 cups bread flour
- 1.5 TBL sugar
- 1 tsp salt
- 1 package active dry yeast
- 3/4 cup water split into 1/4 cup, and another 1/2 cup
- 3 eggs split into 2 eggs, and 1 egg
- 1/4 cup warm milk
- 4 TBL melted butter
- 8 pieces card stock
- 8 pieces aluminum foil
Instructions
- In a medium bowl, mix together 4 cups of bread flour, with your 1.5 TBL of sugar and 1 tsp of salt. Stir, and set aside.
- In a small bown, empty your packet of active dry yeast and add in 1/4 cup of water. Stir until yeast is dissolved. Set aside.
- In your flour bowl mixture, create a well (hole in the middle of your flour mixture) and add in your yeast mixture, 2 eggs, and warm milk, Mix well.
- At this point, add in your additional 1/2 cup of water, 1/2 cup of flour, and your 4 TBL of melted butter and mix until combined.
- Place your dough onto a lightly floured surface and knead until dough is smooth, approximately 5-10 minutes.
- Use oil and lightly grease your bowl and place your dough into the bowl. Cover with a towel and let dough rise for an hour.
- While the dough is rising you can start making your cones. Take a piece of card stock paper and place is horizontal. Halfway into the paper, start rolling the paper into a cone shape.
- Take your cone and roll it in your aluminum foil so the whole cone is covered in foil. Excess foil can be tucked into the top of the cone.
- Once the dough has doubled in size, take dough out and cut into 8 equal pieces.
- Take one piece of your dough and roll out to be around 30 inches in length.
- Spray your aluminum covered cones with non stick spray.
- Start at the bottom of the cone and place it at the end of your rolled out dough piece.
- Roll the cone across the dough, wrapping the dough around as you go up creating your bread cone.
- Repeat with all 8 pieces of your dough.
- Place on a baking sheet covered in parchment paper.
- Use the remaining egg and beat it in a bowl, and brush your bread cones with an egg wash.
- Bake your cones at 400 for 16-18 minutes or until golden brown.
- Enjoy!
Mac and Cheese
Ingredients
The Pasta
- 2 cups shells pasta any size
- 1/2 tsp salt
The Sauce
- 2 1/4 cups warm milk (place in microwave for about 1 and a half minutes to warm)
- 2 1/2 tbsp buttter
- 2 tbsp flour
- 1/2 tsp ground dry mustard
- 1/2 tsp salt
- 1/4 tsp pepper
- 1/2 tsp sugar
- 8 oz shredded cheese (shred yourself for better results) (any kind, but i prefer a sharp white cheddar and gouda mixture)
Optional: The Topping
- 1/2 cup Panko
- 3 tbsp melted butter
- 2 tbsp grated Parmesan cheese
Instructions
The Pasta
- Fill a pot up with water and add the salt to it.
- Wait until the water boils, then add the shells to the boiling water.
- Cook for specified time listed on the box.
- Drain pasta when cooking time is finishe.
The Sauce
- Place the same pan you used to cook your pasta back on the stove. Turn it on medium heat.
- Place the butter in the pan and wait for it to melt.
- Once, butter is melted, add the 2 tbsp of flour and 1/2 tsp ground mustard to the pot.
- Whisk for 1-2 minutes until a paste forms.
- Slowly pour in the warm milk while whisking constantly.
- Keep whisking until milk starts to boil and thicken to a heavy cream consistency.
- Once the milk mixture is thickened, turn off the heat.
- When the mixture stops boiling, add in your 8oz of shredded cheese, salt, sugar, and pepper.
- Stir until cheese is melted.
- Add back in your pasta and mix into the cheese sauce.
- Pour your pasta into a baking dish and set aside.
The Topping
- Mix the panko, parmesan cheese, and melted butter in a small bowl.
- Spread this evenly over the pasta.
- Bake a 375 for 10-20 minutes, until golden brown on top.
Notes